Quick Help (How to...)
The following are the basic steps and procedures in navigating the application.
- Click the Register button.
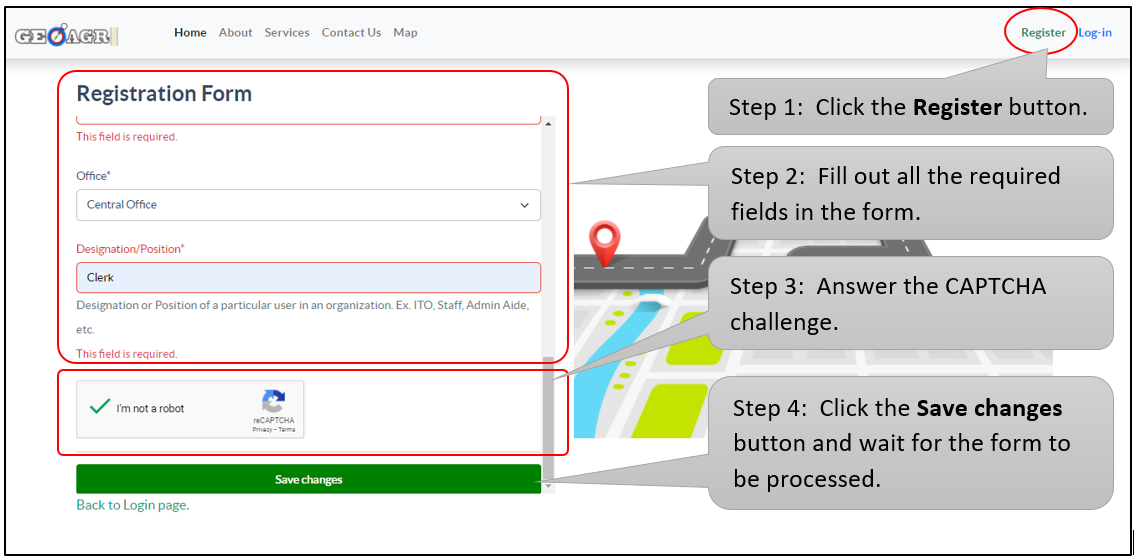
- Fill out the required fields and CAPTCHA in the form.
- Click the Submit button.
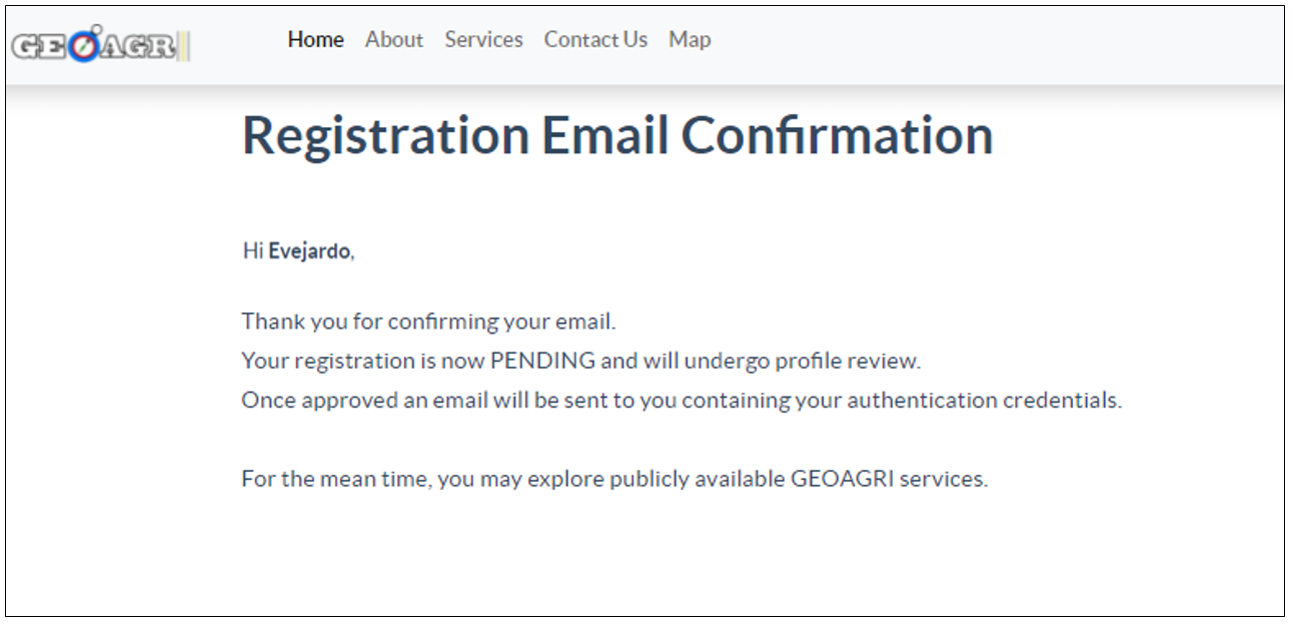
- The Signup Successful page will appear. Verify and confirm your registration by clicking the verification link sent to your email.
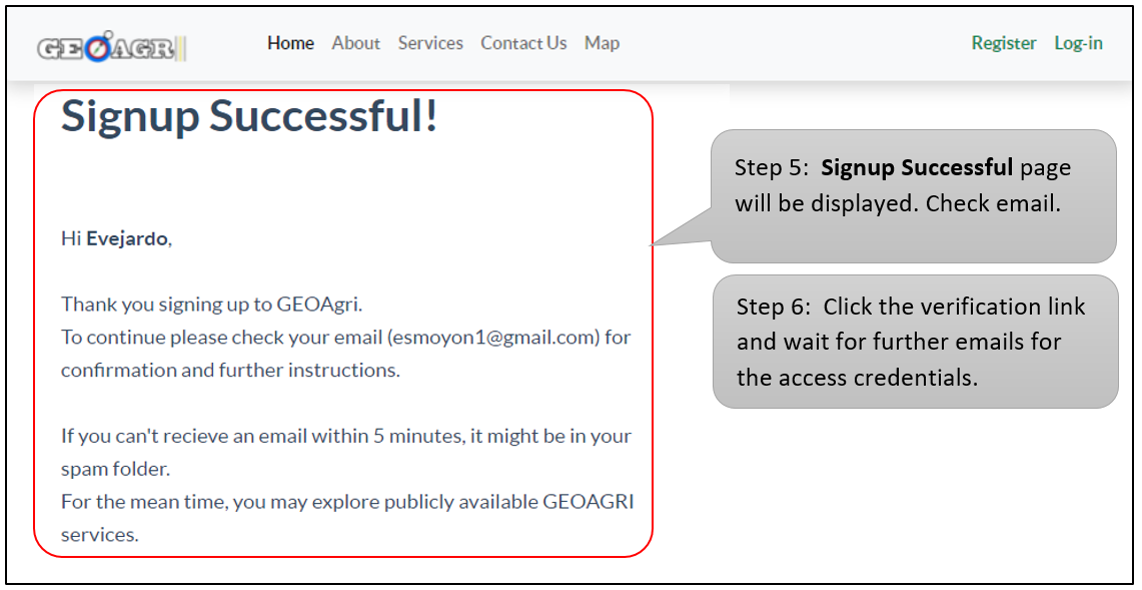
- Once verified, wait for your Admin to approve your request. Another email will be sent containing your temporary login credentials.
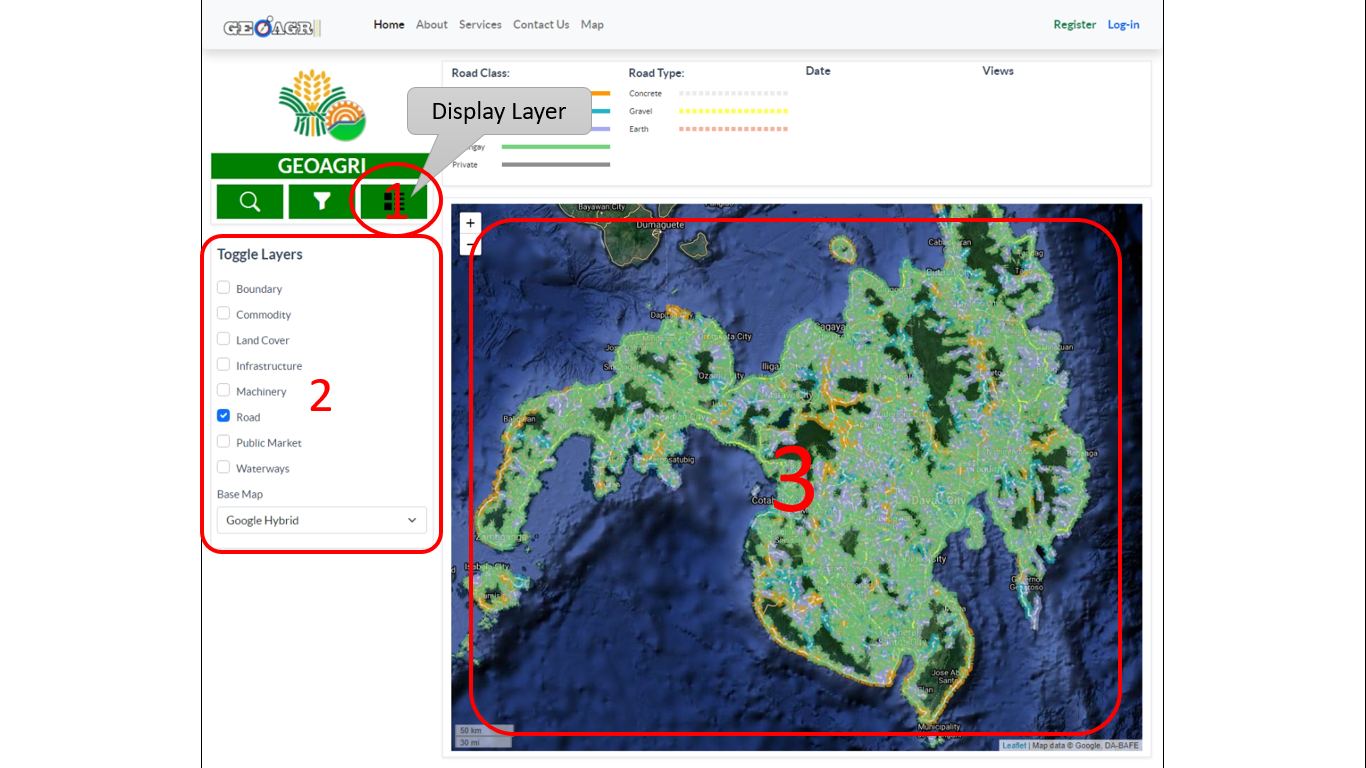
- Click the Display Layer icon in the menu.
- Toggle layers you want to be shown in the map for visualization.
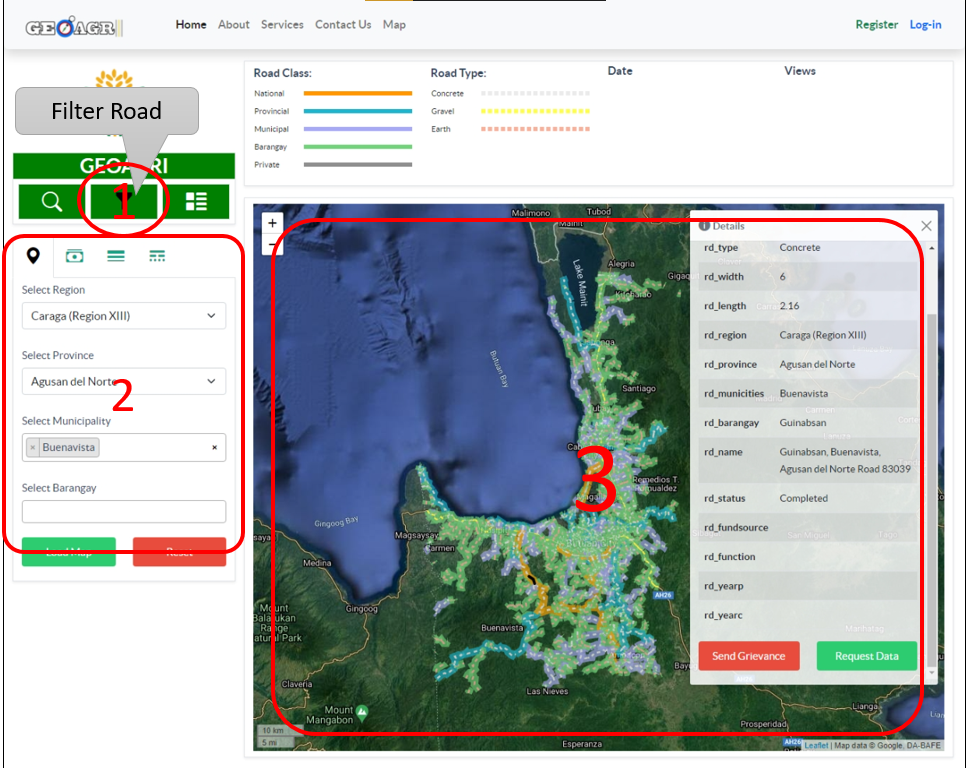
- To filter roads, click the Filter Road icon.
- Define filtering parameters to limit the display of Road Data in the map view. Data can be filtered according to Location, Fund Source, Road Class and Type.
- Click Load Map, the data that will be displayed in the map should be limited to the filter settings.
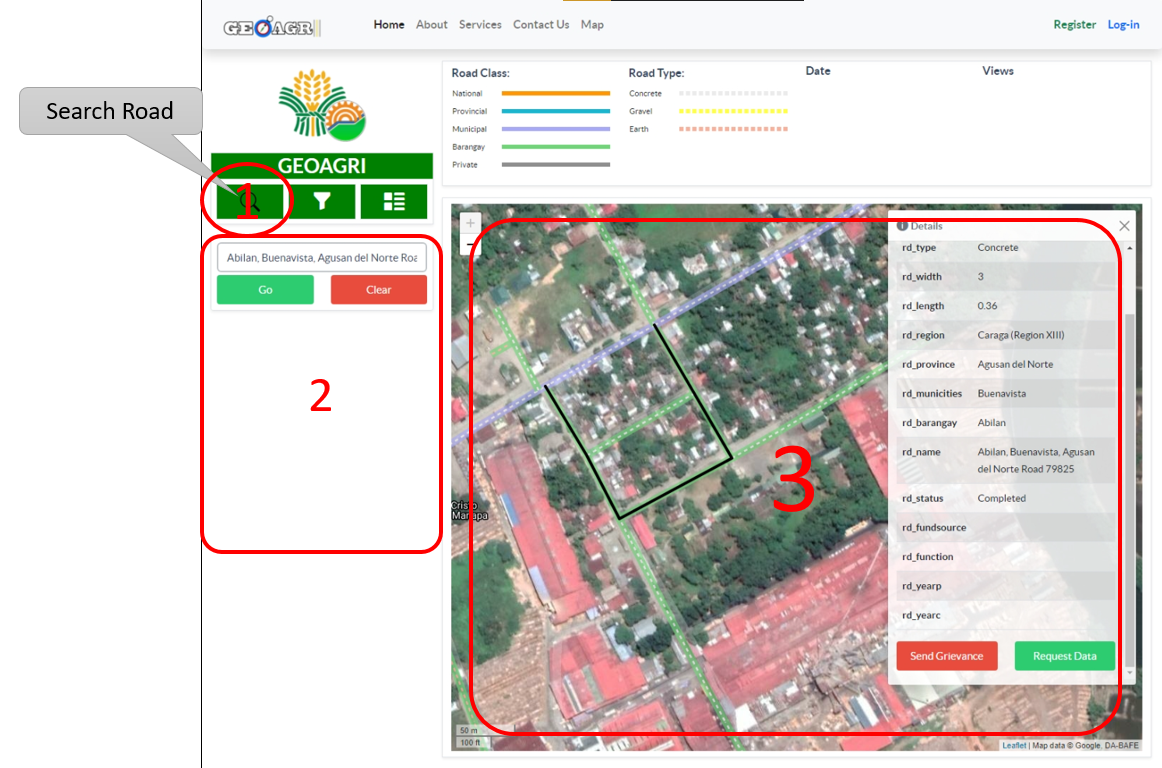
- To search for specific road projects, click the Search Road icon.
- Key in name of the road, click Go, and the road matches to the search will be shown in the map.
- Click on that road feature to display its attributes.
Note: Prepare a shapefile of the road that:
- should contain 4 files (.shp, .dbf, .shx, .prj)
- the GEOMETRY TYPE should be LineString/MultiLineString
- the ATTRIBUTES should at least contains RD_CLASS, RD_TYPE, RD_LENGTH, RD_WIDTH, PROVINCE, REGION, MUNICITIES, BARANGAY, RD_NAME, RD_STATUS (attribute fields are case sensitive).
- Click the Data Management icon in the menu. Then Upload button.
- Browse the shapefile and click Upload.
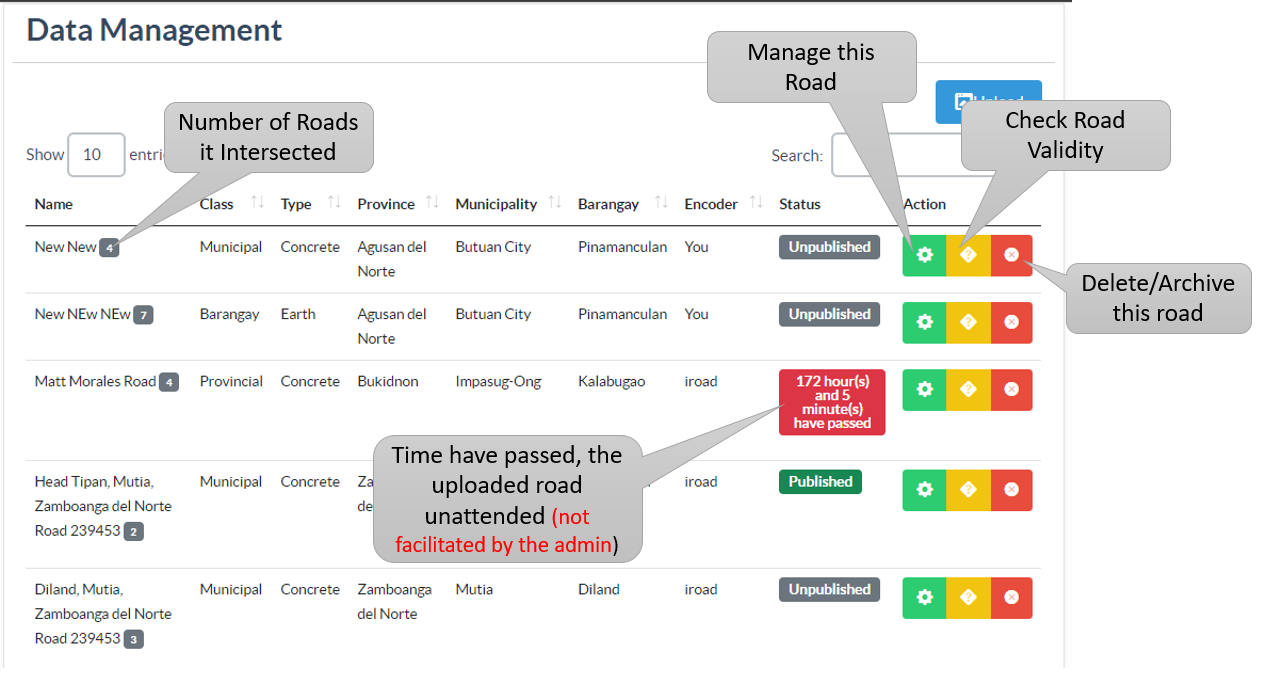
- Once uploaded it will automatically be displayed in the Data Management Table, labeled Unpublished by deafult.
- To manage the uploaded data, several options are provided as shown in the image below.
- Click road project in the map to display the road attributes.
- Click Send Grievance button and fill out the Grievance Form.
- Submit the form and wait for a response via email.
- Click road project in the map to display the road attributes.
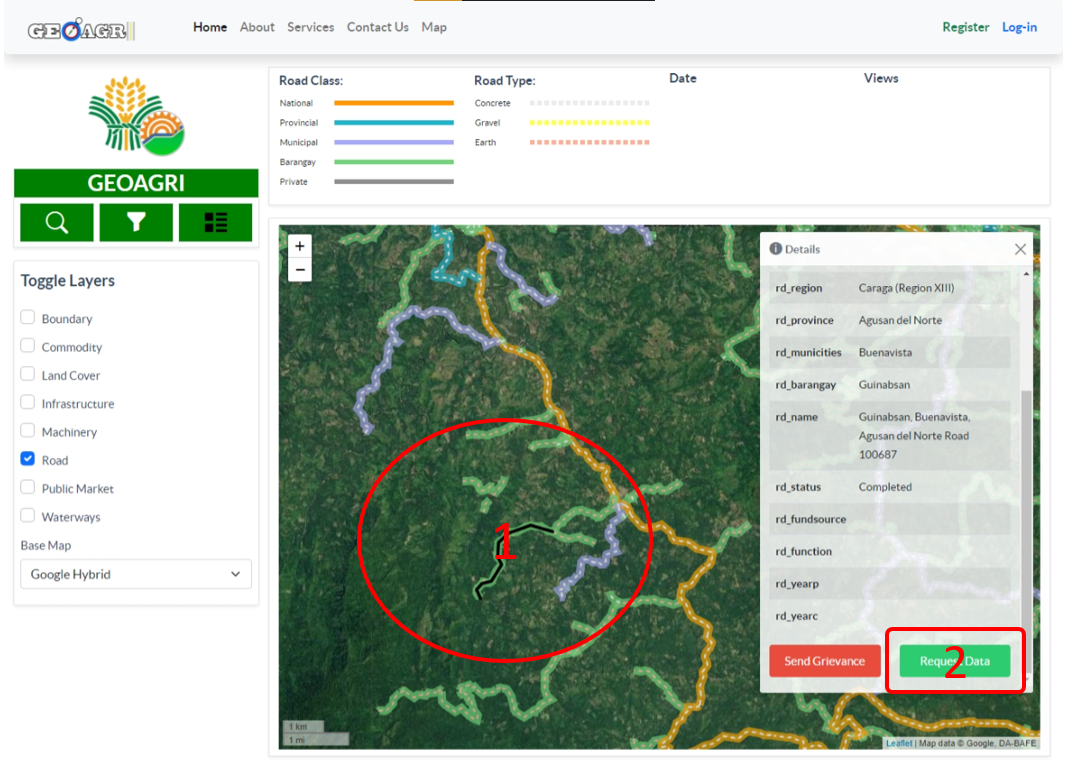
- Click Request Data button and fill out the Request Form.
- Submit the form and wait for a response via email.
Reports Module
- Click Reports to display the list of roads in tabular form.
- Limit the report result by setting the filtering parameters.
- Click the Filter button to display the filtered result in the table.
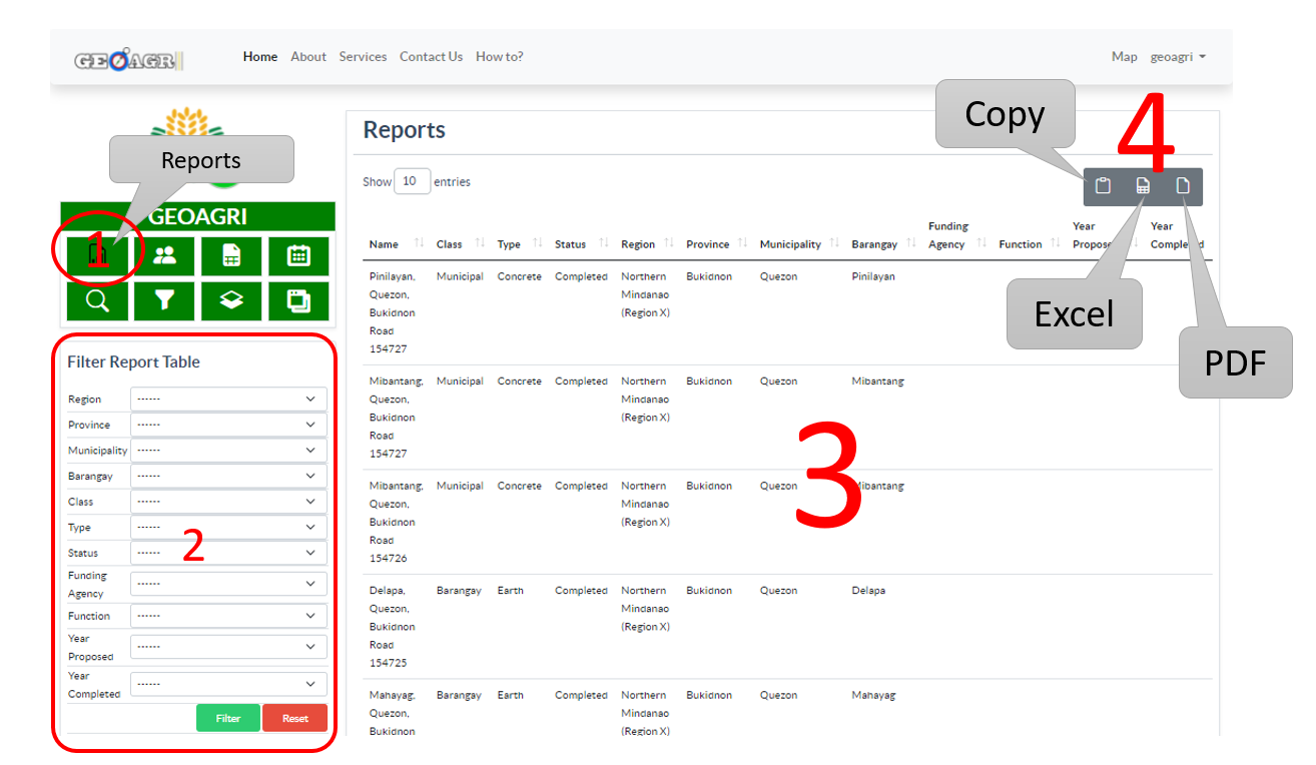
- To export the result, click the export option buttons (Copy, Excel or PDF) at the upper-right of the module.
- Access the GEOAGRI-FMR Dashboard by clicking the Microservices link in the navigation bar.
- Click the FMR Proposal.
Note: The FMR Proposal page consists of two collapsible panels: Entries and Add/Update. Entries Panel displays the list of all proposals you have entered the system. Add/Update Panel is the entry form of the proposal. The form is blank for new proposal, while updating an existing proposal will be filled automatically based on selection. Click on the panel headers to expand or collapse.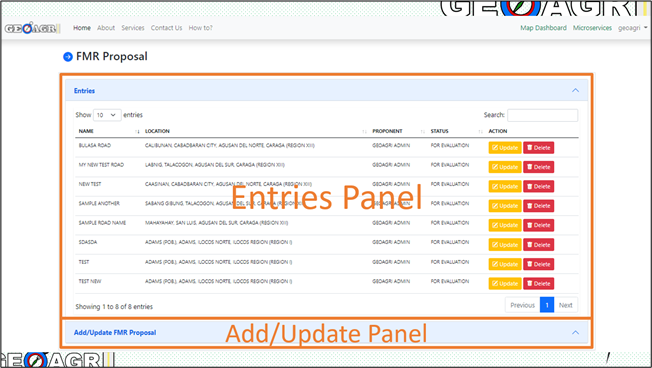
- Click Add/Update panel to add a new proposal. The panel may collapse or expand depending on its current state.
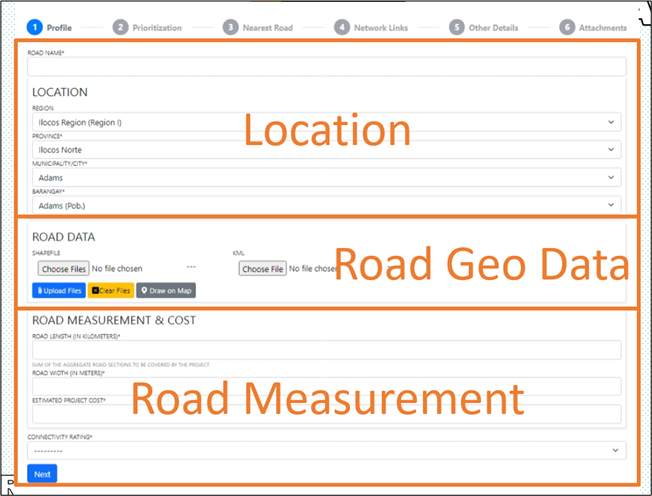
There are six (6) straightforward steps to complete the form. Each step needs to be satisfied to proceed to the next. - Step 1. FMR Profile
- Fill out all the fields reqiured in each of the sections of this form.
- Upload shapefile or KML file of the proposed road or draw directly from the map panel provided.
- Click the Next button to save the form and proceed to step 2.
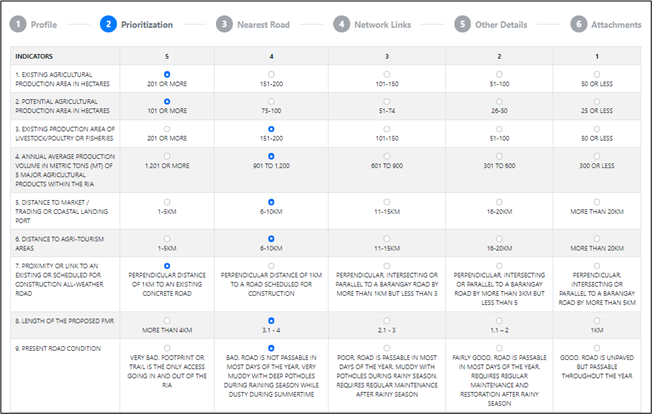
- Step 2. FMR Prioritization Criteria
- Answer all the question in this form. this will serve as the basis form generating the priority score of FMR proposal.
- Click the Next button to save the form and proceed to step 3.
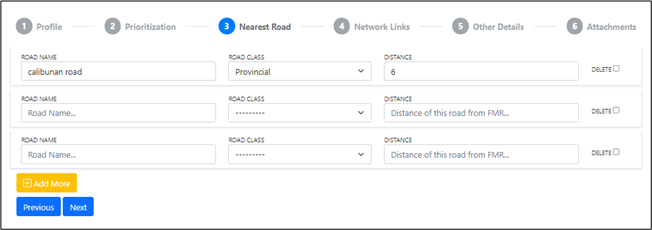
- Step 3. FMR Nearest Roads
- Add all the nearest road possible, provide Name, Class and Distance.
- Check the Delete column to remove the road from the list, if necessary. It will only be deleted after clicking the Next button.
- Click the Next button to save the form and proceed to step 4.
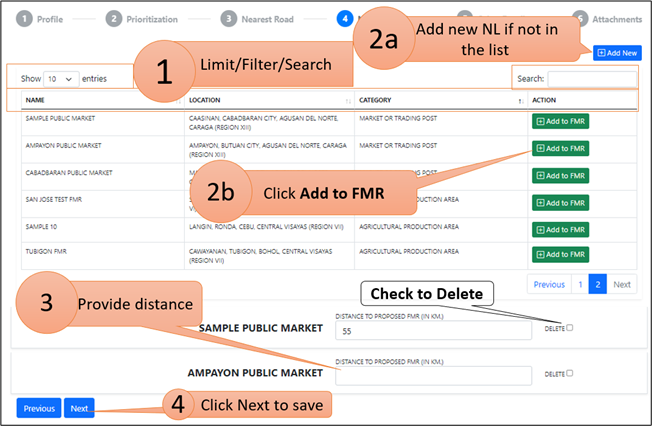
- Step 4. FMR Nwetwork Links
- Search Network Links previously been added. If not in the list, click the Add New button to add to the list.
- Click the Add to FMR button to add the selected NL to the list of linkages connected to the proposed FMR. Then, provide disatnce.
- Click the Next button to save the form and proceed to step 5.
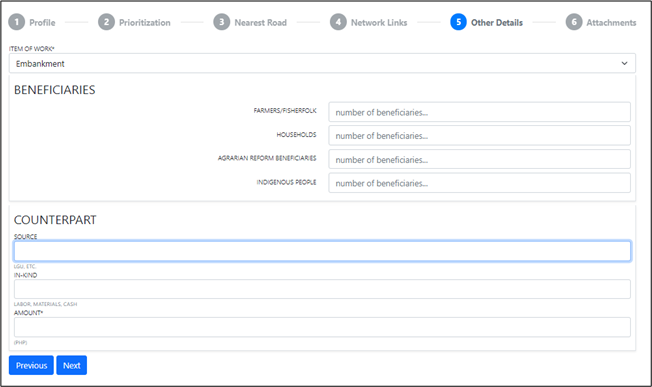
- Step 5. FMR Other Details
- Fill out the form properly, this includes the number of beneficiaries, counterpart funding and item of works. Add New button to add to the list.
- Click the Next button to save the form and proceed to step 6.
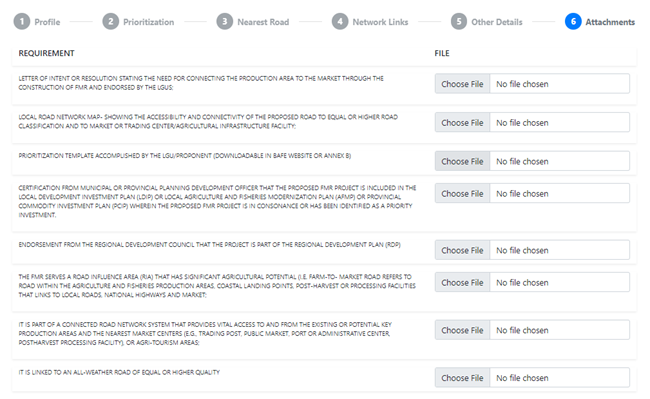
- Step 6. FMR Attachments
The attachment form is the list of requirements that will support in the validation of fmr proposal submitted.- Read each requirements and attach file, if necessary. Uneditable file formats are recommended
- When all required documents are attached, click the Submit button to save and complete the FMR proposal entry.
- Review your proposal in the Entries Panel.
You may also download PRINTABLE manuals for more details.